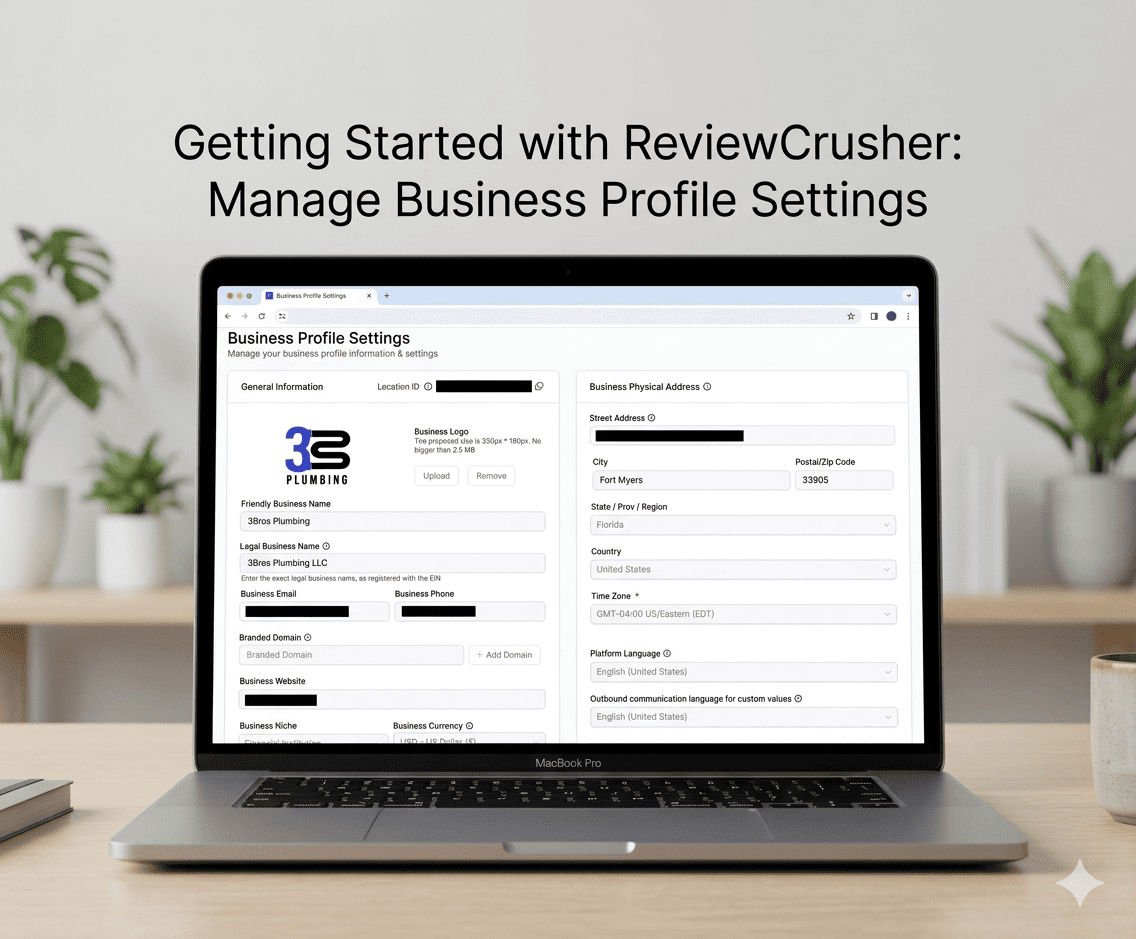
Manage Business Profile Settings
The Business Profile Settings page is where you manage your business information and account-level profile settings.
Based on the screenshots, this page includes several settings sections, including:
- General Information
- Business Physical Address
- Business Information
- Authorized Representative
- General
- Contact Deduplication Preferences
It also includes links that point to other settings pages for related features.
Where to find it
Open the left sidebar and go to:
Settings → Business Profile

What you can do on this page
From this screen, you can:
- upload or remove a business logo
- update your business name and legal business name
- manage business contact details
- add or update your branded domain and website
- set business niche and currency
- update physical address details
- choose time zone and language settings
- maintain business registration information
- update authorized representative details
- adjust general settings
- manage contact deduplication behavior
- review related settings links for other areas
Page overview
The page title shown in the screenshot is:
Business Profile Settings
Below it is a short description:
Manage your business profile information & settings
At the top-left area of the page, the sidebar also shows:
- Go Back
- Settings
- Business Profile
- My Profile
- Integrations
This indicates the Business Profile screen is part of a larger settings area.
General Information
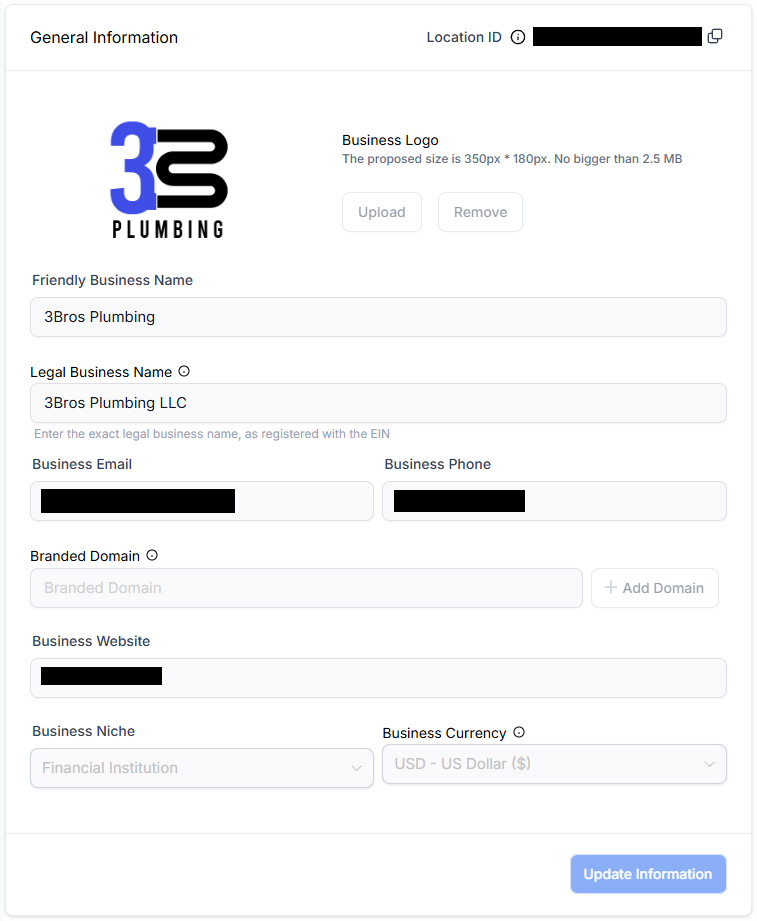
The General Information section contains the main business identity fields.
This section also shows a visible Location ID at the top.
The screenshot includes a copy icon next to the Location ID, which suggests it can be copied.
Location ID
The top of the General Information card shows:
Location ID
followed by the account’s location identifier.
Use this if you need to reference the location in integrations or internal setup work.
Business Logo
The section includes a Business Logo upload area.
The screenshot shows these notes:
- proposed size is 350px × 180px
- no bigger than 2.5 MB
Visible actions include:
- Upload
- Remove
Use this section to add or replace the business logo shown across the account.
Friendly Business Name
The Friendly Business Name field is the display name used for the business.
In the screenshot, it is filled with the brand name.
Use this for the customer-facing or common business name.
Legal Business Name
The Legal Business Name field is used for the formal registered business name.
The screenshot also shows helper text that indicates this should match the legal business name registered with the EIN.
Use this field for the official legal entity name.
Business Email
The Business Email field stores the main business email address.
Use this for business communication and account-related contact purposes.
Business Phone
The Business Phone field stores the main business phone number.
Use the correct format for the phone number used by the business.
Branded Domain
The Branded Domain section appears with an input field and an:
+ Add Domain
button.
This indicates the page supports adding a branded domain, although the screenshot does not show a completed domain entry.
Use this section if your account uses a branded sending or hosted domain.
Business Website
The Business Website field stores the main website URL for the business.
Use the full website address.
Business Niche
The Business Niche field appears as a dropdown.
Use this to categorize the business by niche.
Business Currency
The Business Currency field appears as a dropdown.
Use this to select the business’s operating currency.
Update Information
At the bottom of the General Information card, the screenshot shows:
Update Information
Click this to save changes made in that section.
Business Physical Address
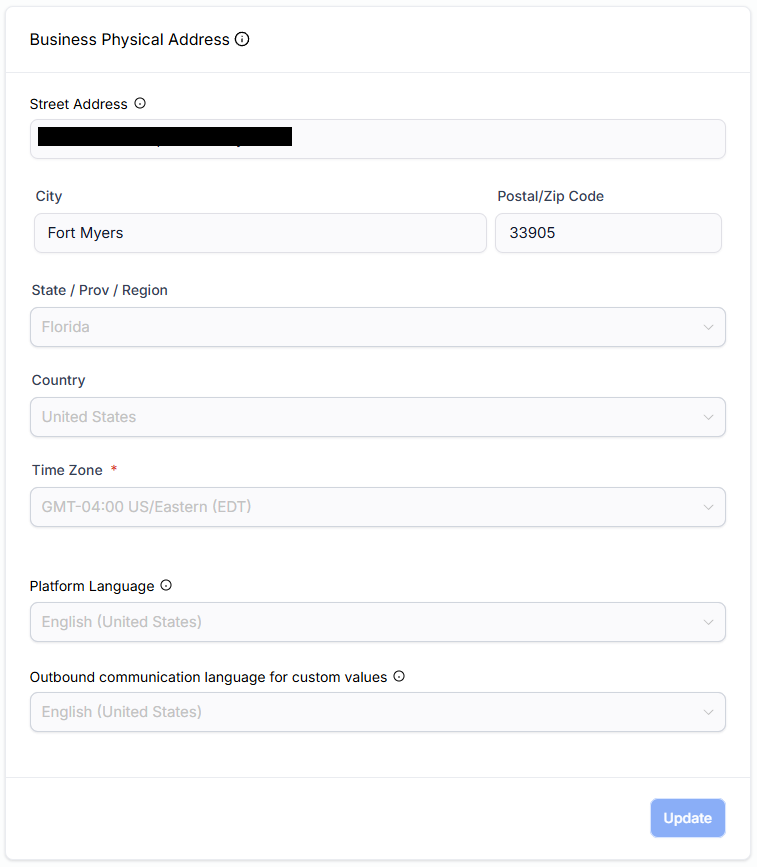
The Business Physical Address section stores the business location details.
This section includes these fields:
- Street Address
- City
- Postal/Zip Code
- State / Prov / Region
- Country
- Time Zone
- Platform Language
- Outbound communication language for custom values
Street Address
Use Street Address to store the main physical address of the business.
City
Use City for the city where the business is located.
Postal/Zip Code
Use Postal/Zip Code for the location’s zip or postal code.
State / Prov / Region
Use State / Prov / Region for the state or equivalent region.
This appears as a dropdown field in the screenshot.
Country
Use Country to store the business’s country.
This also appears as a dropdown.
Time Zone
The Time Zone field is marked as required in the screenshot.
Use this to set the operating time zone for the business account.
Platform Language
Use Platform Language to choose the account language setting.
Outbound communication language for custom values
This field appears as a dropdown.
Use it if your account needs a specific language setting for outbound communication custom values.
Update
At the bottom of the Business Physical Address card, the screenshot shows:
Update
Use this to save changes made in that section.
Business Information

Farther down the page, the screenshots show a Business Information section.
This section includes:
- Business Type
- Business Industry
- Business Registration ID Type
- Business Registration Number
- My business is Not registered
- Business Regions of Operations
Business Type
Use Business Type to classify the business.
This appears as a dropdown in the screenshot.
Business Industry
Use Business Industry to define the industry category.
This also appears as a dropdown.
Business Registration ID Type
Use Business Registration ID Type to choose the type of registration identifier used by the business.
Business Registration Number
Use Business Registration Number to enter the corresponding registration number.
If the business is not formally registered, the screenshot shows a checkbox labeled:
My business is Not registered
Business Regions of Operations
The screenshots show these visible region checkboxes:
- Africa
- Asia
- Europe
- Latin America
- USA and Canada
Use these to indicate where the business operates.
Update Information
At the bottom of the Business Information card, the page again shows:
Update Information
Use this button to save changes in that section.
Authorized Representative
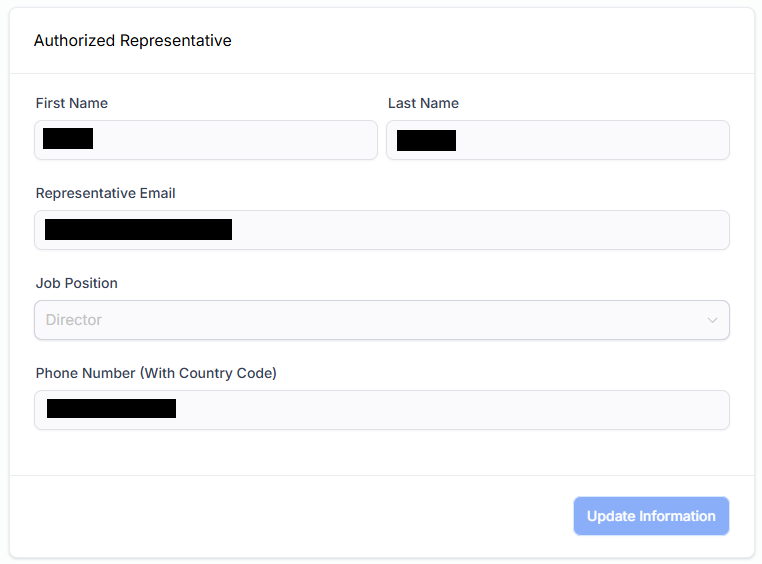
The Authorized Representative section stores the details of the person representing the business.
The screenshots show these fields:
- First Name
- Last Name
- Representative Email
- Job Position
- Phone Number (With Country Code)
First Name and Last Name
Use these fields to enter the authorized representative’s name.
Representative Email
Use Representative Email to store the representative’s email address.
Job Position
Use Job Position to select or store the representative’s role.
In the screenshot, this appears as a dropdown and includes a value such as CEO.
Phone Number (With Country Code)
Use this field to store the representative’s phone number including country code.
Update Information
At the bottom of this section, the screenshot shows:
Update Information
Use it to save representative details.
General settings
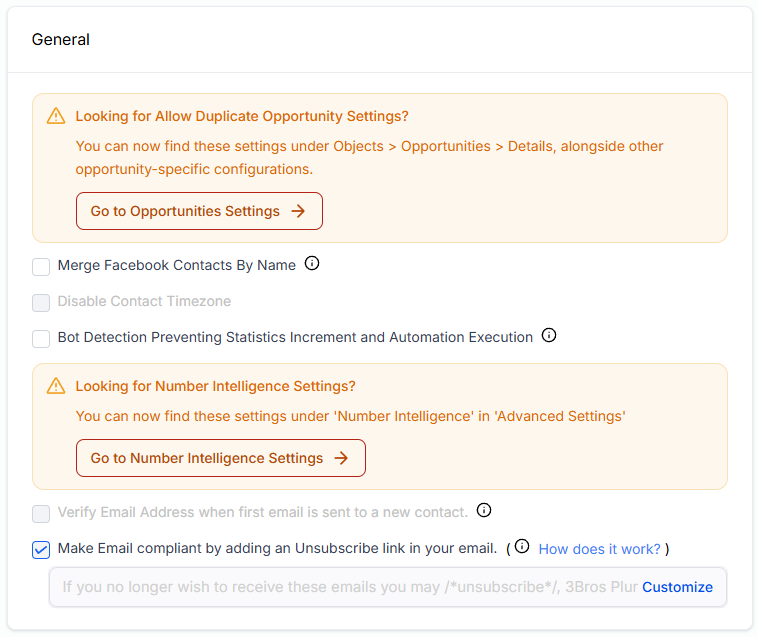
The screenshots also show a General section with settings and linked notices.
Visible items include:
- Merge Facebook Contacts By Name
- Disable Contact Timezone
- Bot Detection Preventing Statistics Increment and Automation Execution
- Verify Email Address when first email is sent to a new contact
- Make Email compliant by adding an Unsubscribe link in your email
Some of these appear enabled or disabled in the screenshot.
Merge Facebook Contacts By Name
This appears as a checkbox option.
Use it if your workflow needs Facebook contacts merged by name.
Disable Contact Timezone
This also appears as a checkbox option.
Use it if that timezone behavior should be disabled.
Bot Detection Preventing Statistics Increment and Automation Execution
This appears as another checkbox option.
Use it if you need the platform’s bot detection behavior adjusted for statistics and automations.
Verify Email Address when first email is sent to a new contact
This option appears in the screenshot as a checkbox.
Use it if you want email verification to occur when the first email is sent to a new contact.
Make Email compliant by adding an Unsubscribe link in your email
This checkbox is visibly enabled in the screenshot.
The page also shows a Customize option next to the unsubscribe text area.
Use this setting if you want emails to include an unsubscribe link for compliance.
Contact Deduplication Preferences

Another visible section is:
Contact Deduplication Preferences
This section controls how the system handles duplicate contacts.
The screenshots show:
- Allow Duplicate Contact
- Find existing contacts based on
- Second preference for search (Optional)
Allow Duplicate Contact
This appears as a toggle.
If enabled, duplicate contacts can be allowed.
If disabled, the system will try to prevent duplicates based on the selected matching rules.
Find existing contacts based on
The screenshot shows a dropdown with a selected value of:
Use this setting to choose the primary field used to identify existing contacts.
Second preference for search (Optional)
This field appears as another dropdown.
The screenshot shows Phone as a visible option or placeholder.
Use this if you want a secondary matching field in addition to the primary one.
Linked settings notices
The screenshots show several orange notice boxes that point to other settings areas.
These include:
- Looking for Call & Voicemail Settings?
- Looking for Allow Duplicate Opportunity Settings?
- Looking for Number Intelligence Settings?
- Looking for Missed Call Textback Settings?
Each notice includes a button leading to the related settings page.
Examples shown include:
- Go to Call & Voicemail Settings
- Go to Opportunities Settings
- Go to Number Intelligence Settings
- Go To Missed Call Textback Settings
These are informational shortcuts and indicate those settings are managed elsewhere.
How to use Business Profile Settings
A practical workflow based on the screenshots is:
- open Settings → Business Profile
- review and update General Information
- save using Update Information
- review and update Business Physical Address
- click Update
- scroll down to Business Information
- complete or revise business registration details
- update the Authorized Representative
- review the General settings and compliance options
- review Contact Deduplication Preferences
- use the linked notice boxes if you need settings located elsewhere
Best practices
- keep the legal business name aligned with official registration records
- use a correctly sized business logo
- keep business email, phone, and website current
- make sure time zone and platform language are set correctly
- review representative details for accuracy
- use contact deduplication carefully to avoid duplicate records
- leave email compliance settings enabled when needed for sending compliance
- use the linked notice boxes instead of looking for moved settings in the wrong section
Troubleshooting
I cannot find call or voicemail settings here
The screenshot shows a notice that these settings are now under another area, with a button to open them.
I cannot find duplicate opportunity settings here
Use the Go to Opportunities Settings button shown in the notice box.
I cannot find number intelligence settings here
Use the Go to Number Intelligence Settings button shown in the notice box.
I cannot find missed call textback settings here
Use the Go To Missed Call Textback Settings button shown in the notice box.
My business is not registered
The Business Information section includes a checkbox for:
My business is Not registered
Use that if it applies to your business.
I need to change how duplicates are handled
Go to Contact Deduplication Preferences and update the duplicate contact settings and search preferences.
What this feature is for
The Business Profile Settings page is the main account profile configuration area for your business.
Based on the screenshots, it is used to maintain:
- business identity
- business address and locale settings
- registration details
- representative information
- general account settings
- contact matching behavior