View and Configure Notifications

The Notifications section lets you monitor incoming review activity and manage who receives alerts.
From the screenshots, this area supports:
- viewing notification history
- marking notifications as read
- opening notification settings
- setting email and SMS notification preferences
- assigning team members for private and public feedback alerts
Where to find it
Open the left sidebar and go to:
Notifications
What you can do on this page
From this area, you can:
- view recent notification activity
- read notification details
- mark individual notifications as read
- open Notification Settings
- add multiple team members for notifications
- choose whether alerts go by:
- SMS
- choose whether each team member receives:
- Private Feedback
- Public Feedback
Notifications page
The main page title shown in the screenshot is:
Notifications
At the top-right of the page, there is a:
Settings
button.
Below it is a vertical list of notification items.
Notification items

Each notification item in the screenshot shows:
- a red dot indicator on the left
- a notification title
- a message preview
- a date and time
- a Mark as Read link on the right
The repeated title shown in the screenshot is:
New Rating Received
This indicates the page is showing rating-related alerts.
Notification content
Each notification includes a short activity summary.
From the screenshots, examples include:
- a customer gave a 5-star review with comment text
- a customer gave a 1-star rating with feedback
- a reviewer name or identifier
- email address in some entries
- written feedback in some entries
This helps you quickly understand what happened without opening another page first.
Date and time
Each notification entry shows a timestamp below the message text.
This helps you identify when the rating or feedback was received.
Mark as Read
On the right side of each notification item, the screenshot shows:
Mark as Read
Use this to mark that specific notification as read.
This helps clean up your notification list and makes it easier to focus on new items.
Open Notification Settings

To manage notification recipients and preferences, click:
Settings
This opens the Notification Settings page.
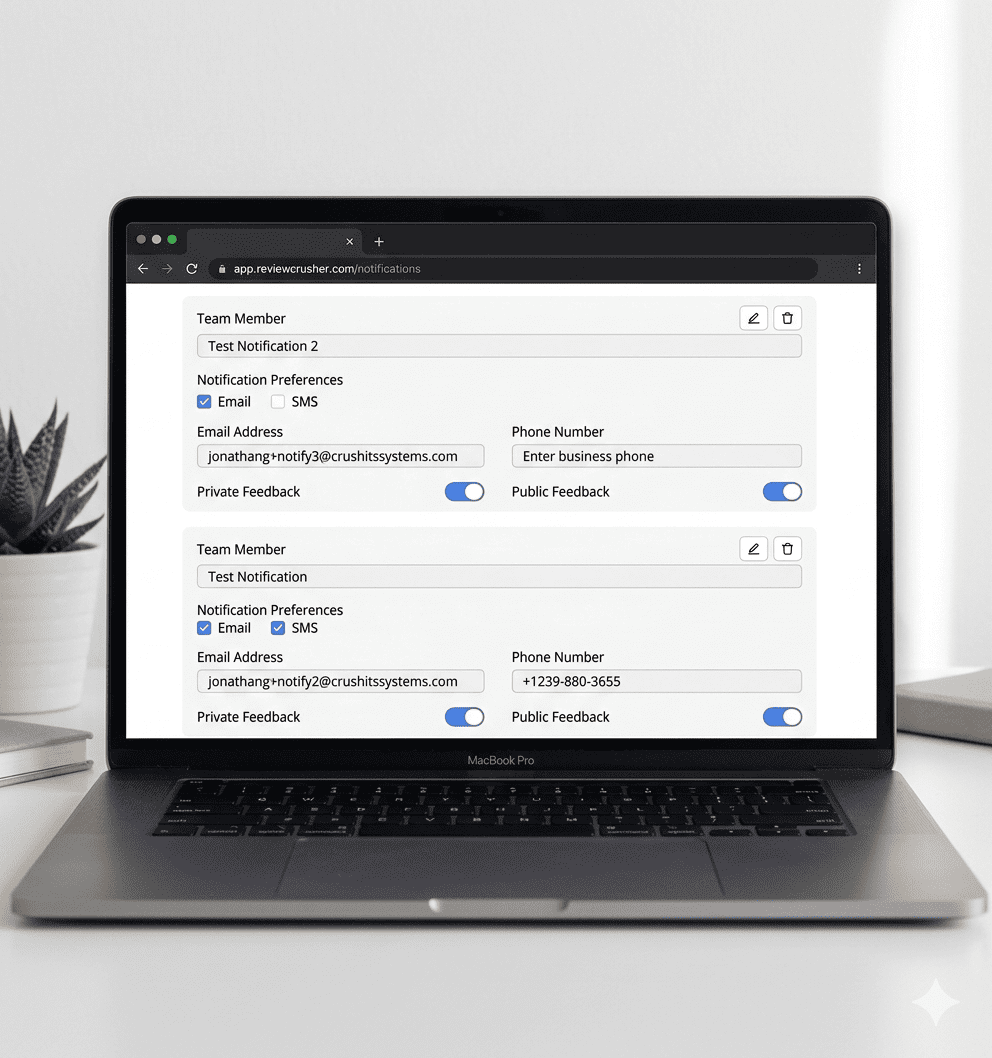
Notification Settings page
The settings page title shown in the screenshot is:
Notification Settings
At the top-left, there is a back arrow to return to the previous screen.
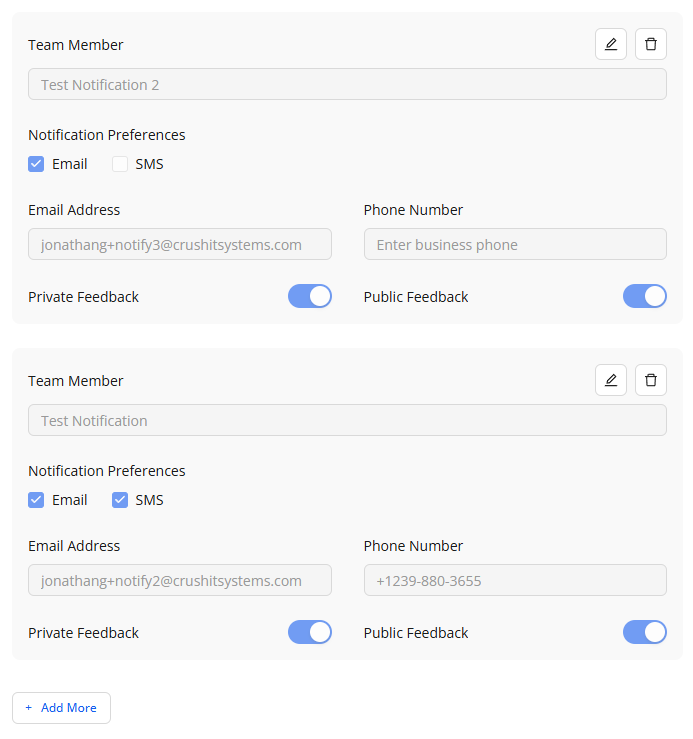
The page displays one or more team member notification cards.
Each card is used to define how a specific team member should receive alerts.
Team Member section
Each settings card starts with a:
Team Member
field.
The screenshots show example team member names such as:
- Test Notification 2
- Test Notification
This appears to identify the notification recipient profile.
Edit and delete icons

At the top-right of each team member card, the screenshots show two action icons:
- edit icon
- delete icon
Use these to modify or remove that notification recipient setup.
Notification Preferences
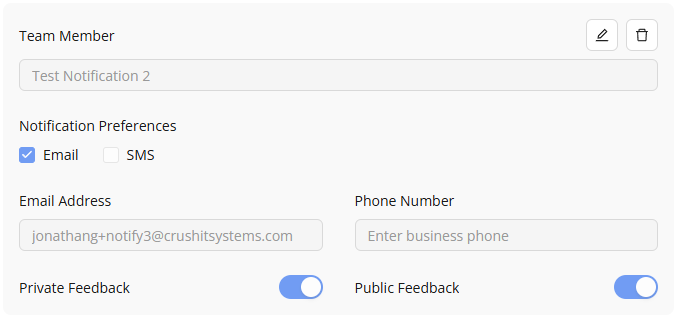
Each team member card includes a section labeled:
Notification Preferences
The screenshots show 2 checkbox options:
- SMS
You can choose whether the team member receives notifications by email, SMS, or both.
Example shown in screenshots
One team member has:
- Email checked
- SMS unchecked
Another team member has:
- Email checked
- SMS checked
Email Address
Each team member card includes an:
Email Address
field.
Use this to enter the email address where notifications should be sent.
The screenshot shows example email addresses using the business domain.
Phone Number
Each team member card also includes a:
Phone Number
field.
Use this to enter the number that should receive SMS notifications.
In one screenshot, the field is empty. In another, it contains a phone number.
If SMS is part of the team member’s notification preference, this field should be filled in.
Feedback type toggles
At the bottom of each team member card, the screenshots show two toggles:
- Private Feedback
- Public Feedback
These toggles control which type of feedback notifications that team member receives.
Private Feedback
Use this toggle if the team member should receive alerts related to private feedback.
Public Feedback
Use this toggle if the team member should receive alerts related to public feedback.
In the screenshots, both toggles appear enabled for the visible team members.
Add more notification recipients
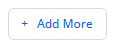
At the bottom of the Notification Settings page, the screenshot shows an:
+ Add More
button.
Use this to add another team member notification card.
This is helpful if multiple people in your business need alerts.
How to use Notifications
A practical workflow based on the screenshots is:
- open Notifications
- review the latest notification items
- use Mark as Read on items you have already handled
- click Settings
- for each team member:
- enter the team member name
- choose Email and/or SMS
- enter the email address
- enter the phone number if SMS is used
- choose Private Feedback and/or Public Feedback
- click + Add More if you want additional notification recipients
- use the edit or delete icons to maintain existing notification setups
Best practices
- assign notifications to the right people instead of sending everything to one inbox
- use Email for general monitoring
- use SMS only when fast attention is needed
- make sure phone numbers are entered if SMS is enabled
- decide clearly who should receive:
- private feedback
- public feedback
- mark handled notifications as read to keep the list manageable
Troubleshooting
I want to stop a team member from receiving notifications
Open Notification Settings and either:
- uncheck Email or SMS
- turn off the relevant feedback toggles
- or use the delete icon to remove that team member entry
SMS is enabled but alerts may not be working
Check that the Phone Number field is filled in for that team member.
I want one person to receive only email alerts
In Notification Preferences, check Email and leave SMS unchecked.
I want one person to receive only private feedback alerts
Turn on Private Feedback and turn off Public Feedback for that team member.
I want to add more recipients
Click + Add More on the Notification Settings page.
What this feature is for
The Notifications section helps your team stay aware of new ratings and feedback activity.
Based on the screenshots, it supports both:
- viewing notification history
- configuring who gets alerted and how they receive those alerts