View and Manage Review Requests
The Requests tab shows the review requests that have already been sent or scheduled.
This page gives you a searchable list of requests so you can review recipient details, see how the request was sent, check its status, and manage individual request entries.

Where to find it
Go to:
Get More Reviews → Requests
What you can do on this page
From this screen, you can:
- view existing review requests
- search for a request
- check whether the request was sent by email, SMS, or both
- see the date sent
- review the current status
- open the three-dot menu for more actions
- move through multiple pages of request history
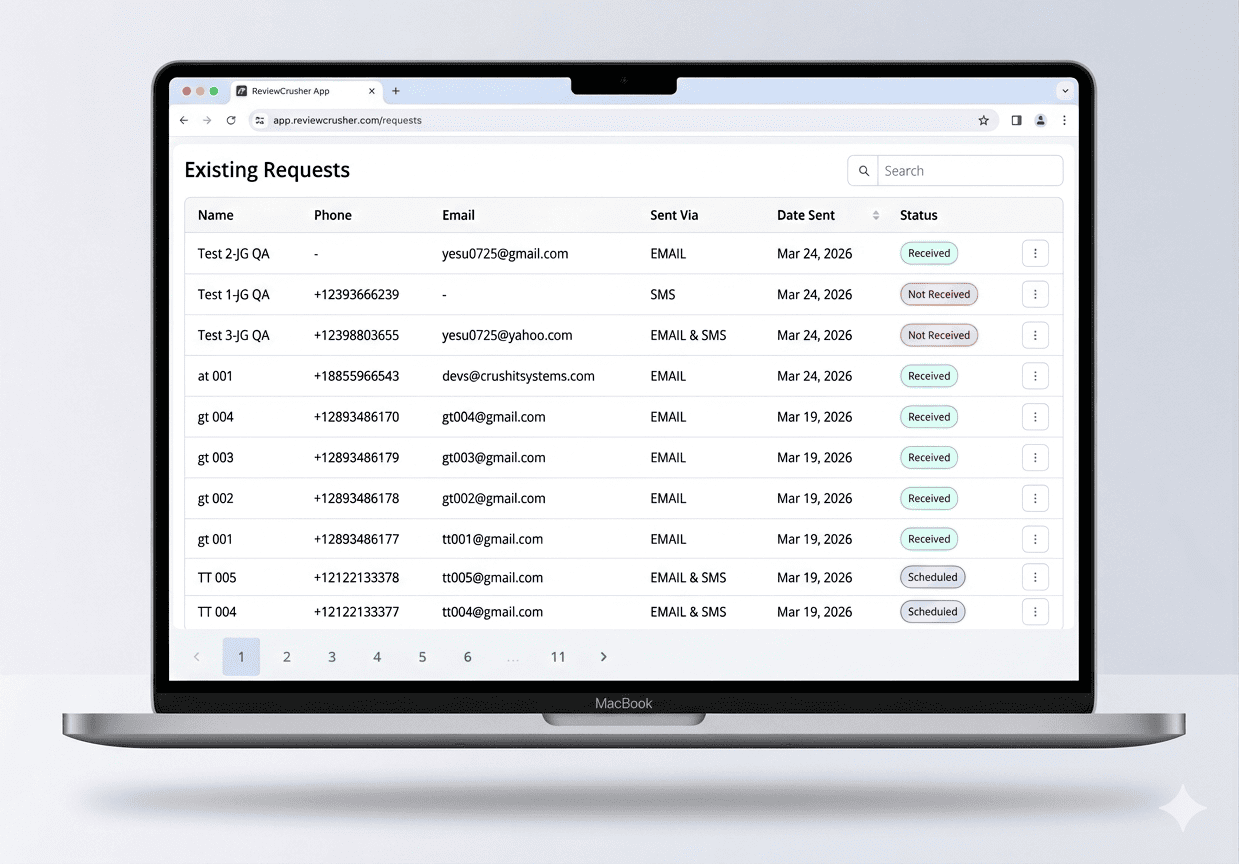
Existing Requests table
The page shows a table labeled:
Existing Requests
The visible columns in the screenshot are:
- Name
- Phone
- Sent Via
- Date Sent
- Status
Each row also includes a three-dot menu on the far right.
What each column means
Name
The contact or request name associated with the review request.
Phone
The phone number connected to the request, when available.
Some rows may show a dash (-) if no phone number is present.
The email address connected to the request, when available.
Some rows may show a dash (-) if no email address is present.
Sent Via
This shows how the request was sent.
The screenshot shows values such as:
- SMS
- EMAIL & SMS
Date Sent
This shows the date the request was sent.
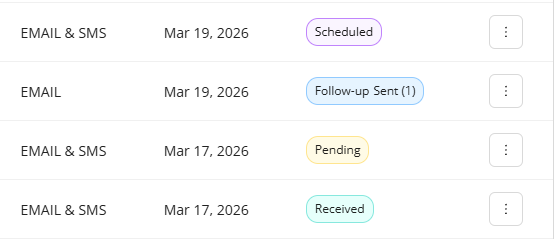
Status
This shows the current state of the request.
The screenshot shows these statuses:
- Received
- Not Received
- Pending
- Scheduled
Each status is displayed as a colored label.
Search for a request
At the top-right of the table, there is a Search field.

Use this to find a request more quickly without manually scanning the full list.
This is useful when you want to look up:
- a specific customer
- a specific email address
- a specific phone number
- a recent request entry
Sort by date
The Date Sent column shows a sort icon in the screenshot.
This suggests the request list can be sorted by sent date.
Use this when you want to review:
- the most recent requests
- older requests
- request activity by date order
Understand request statuses
The screenshot shows several request statuses. Based on the visible UI, the page helps you quickly identify what happened with each request.
Received
A Received status appears on multiple rows.
This indicates the request has been received.
Not Received
A Not Received status appears on one row.
This indicates the request was not received.
Pending
A Pending status appears on one row.
This indicates the request is still in progress or awaiting completion.
Scheduled
A Scheduled status appears on multiple rows.
This indicates the request is scheduled rather than already completed.
Manage a request with the three-dot menu

Each row includes a three-dot menu on the far right.
When opened, the screenshot shows these options:
- Resend
- Delete
These actions let you manage an individual request entry.
Resend
Use Resend if you want to send the request again.
This is useful when:
- the original request was missed
- the recipient says they did not receive it
- you want to send a fresh copy of the request
Before resending, review the row details first so you know whether the request was originally sent by:
- SMS
- both
Delete
Use Delete if you want to remove the request entry.
Be careful before deleting, especially if you may need the request history later for tracking or support purposes.
Pagination
At the bottom of the page, the screenshot shows pagination controls.
Visible page controls include:
- back arrow
- page numbers
- ellipsis
- next arrow
This means the Requests list can span multiple pages.
Use pagination to move through older or additional request records.
How to use the Requests page
A practical workflow based on the screenshot is:
- go to Get More Reviews → Requests
- review the Existing Requests table
- use Search if you need a specific request
- check:
- Name
- Phone
- Sent Via
- Date Sent
- Status
- open the three-dot menu for the request you want to manage
- choose:
- Resend
- Delete
- use pagination at the bottom to move through more results
Best practices
- use the Search field before manually scrolling through long request lists
- check Sent Via before resending so you understand how the request was originally delivered
- review the Status before taking action
- be cautious with Delete, especially if the request history may still be needed
- use the Date Sent column to review recent activity first
Troubleshooting
I cannot find a request
Use the Search field and check different pages using the pagination controls.
I want to send the request again
Open the three-dot menu and choose Resend.
I want to remove a request
Open the three-dot menu and choose Delete.
I am not sure how the request was sent
Check the Sent Via column. The screenshot shows possible values:
- SMS
- EMAIL & SMS
I need to review request activity from another date
Use the Date Sent column and pagination controls.
What this page is useful for
The Requests page is useful for:
- checking request history
- reviewing delivery methods
- verifying whether a request was received
- following up on missed requests
- resending requests when needed
- cleaning up request records